Push-ups are a cornerstone of fitness, celebrated for their simplicity and effectiveness. Whether you’re a seasoned athlete or just beginning your fitness journey, mastering the this exercise can significantly enhance your strength, endurance, and overall health. This guide will walk you through how to perform a proper push-up, address common pain points, and provide modifications to help you continue progressing in your fitness routine.
Introduction: The Benefits of Push-Ups
Push-ups are more than just an upper-body exercise. They engage multiple muscle groups, including the chest, shoulders, triceps, and core, making them a powerhouse move for full-body strength. Incorporating push-ups into your workout routine can improve muscle tone, enhance cardiovascular health, and increase overall functional fitness.
What is a Push-Up?
A push-up is a bodyweight exercise where you lift and lower your body using your arms while maintaining a rigid plank position. This simple movement is incredibly versatile, offering numerous variations to target different muscle groups and accommodate various fitness levels.

Muscles Worked by Push-Ups
- Chest (Pectorals): The primary muscle group engaged.
- Shoulders (Deltoids): Stabilize and assist in the movement.
- Triceps: Crucial for the pushing motion.
- Core: Keeps your body stable and aligned.
- Back (Latissimus Dorsi and Rhomboids): Provide additional support and stability.
Integrating Push-Ups into Your Workout Routine
To maximize the benefits of this exercise, integrate them into your routine with proper progression:
- Warm-Up: Always start with a warm-up to prepare your muscles and joints.
- Frequency: Aim for 3-4 times a week, allowing rest days in between.
- Sets and Reps: Begin with 2-3 sets of 8-12 reps, adjusting as you gain strength.
- Progression: Gradually increase intensity by adding more reps or trying advanced variations.
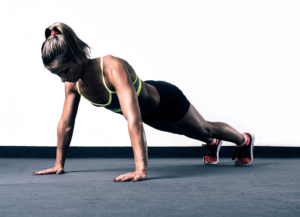
What is a Proper Push-Up?
Properly Performing a push-up is crucial to maximize benefits and prevent injury. Here’s a step-by-step guide:
- Start in Plank Position: Place your hands slightly wider than shoulder-width apart, shoulders are directly over wrists, and the body forms a straight line from head to heels.
- Engage Core and Glutes: Maintain a neutral spine by engaging your core and glutes.
- Lower Your Body: Bend your elbows at a 45-degree angle, keeping them close to your body. Lower yourself until your chest nearly touches the floor.
- Push Back Up: Press into your palms and extend your elbows, returning to the starting position. Ensure your body remains in a straight line throughout the movement.
Addressing Pain During Push-Ups
Experiencing pain during exercise can be discouraging, but there are modifications you can make to continue reaping the benefits without discomfort. Here’s how to adjust your form based on common pain points:
Wrist Pain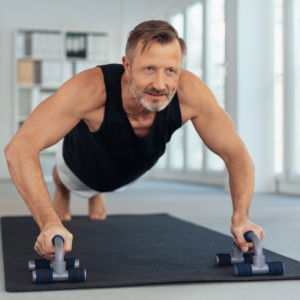
- Modification: Use push-up handles or perform them on your fists to keep your wrists in a neutral position. Alternatively, try incline push-ups with elevated hands on a bench or step.
Back Pain
- Modification: Ensure your core is engaged throughout the movement to prevent sagging hips. If pain persists, try knee or incline push-ups to reduce the load on your lower back.
 Neck Pain
- Modification: Keep your neck aligned with your spine by looking straight down. Avoid letting your head drop or craning your neck upwards.
 Shoulder Pain
- Modification: Adjust your hand placement to avoid excessive strain on your shoulders. Narrow your grip or try wall push-ups to reduce the load on your shoulder joints.
 Foot/Ankle Pain
- Modification: Place a folded mat or towel under your feet for added support. Ensure you evenly distribute your weight across your toes.
Push-Up Modifications for Different Fitness Levels
Regardless of your fitness level, there are push-up variations to challenge and help you progress.
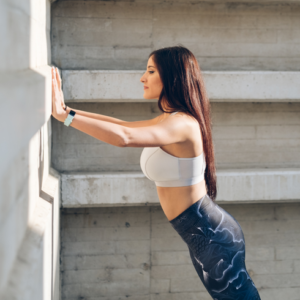
Push-Up Beginner Modifications
- Wall Push-Ups: Stand facing a wall, place your hands on the wall at shoulder height, and perform push-ups.
- Knee Push-Ups: Perform push-ups with your knees on the ground, keeping your body in a straight line from head to knees.
- Incline Push-Ups: Place your hands on an elevated surface like a bench or step.
Push-Up Intermediate Modifications
- Standard Push-Ups: Perform push-ups using the proper form described above.
- Wide Push-Ups: Place your hands wider than shoulder-width apart to target the chest more.
- Diamond Push-Ups: Place your hands close together under your chest, forming a diamond shape with your fingers to target the triceps.

Push-Up Advanced Modifications
- Decline Push-Ups: Place your feet on an elevated surface to increase the difficulty.
- Plyometric Push-Ups: Perform explosive push-ups, lifting your hands off the ground at the top of the movement.
- One-Arm Push-Ups: Perform push-ups with one arm behind your back for an intense challenge.

Conclusion
Push-ups are a versatile and effective exercise that can be tailored to any fitness level. By understanding proper form, addressing pain points, and utilizing appropriate modifications, you can continue to benefit from this foundational movement. Remember, consistency and progression are essential. Whether you’re a beginner or an advanced athlete, there’s always room to grow and improve.
Ready to take your fitness to the next level? Start incorporating these variations into your routine today and experience the transformation. Keep pushing forward and stay committed to your health and fitness journey. If you are uncomfortable trying these ideas out on your own, contact Newleaf Total Wellness Centre and book an appointment with one of our Kinesiologists for guidance and support.
Written by: DeVera Nybo, MBA, Owner, Newleaf Total Wellness Centre